Use a custom template to create your first Biolink Page with ease.
At LinkBossPro, we understand that your time is precious and that creating your own page from scratch can seem rather daunting.
So, we have created a few elegant custom template styles that are pre-designed, set up for you to easily customize and publish in a few minutes.
To get started follow the steps below:
Step1. Select “Create Biolink Page” on the right-hand side of your dashboard.
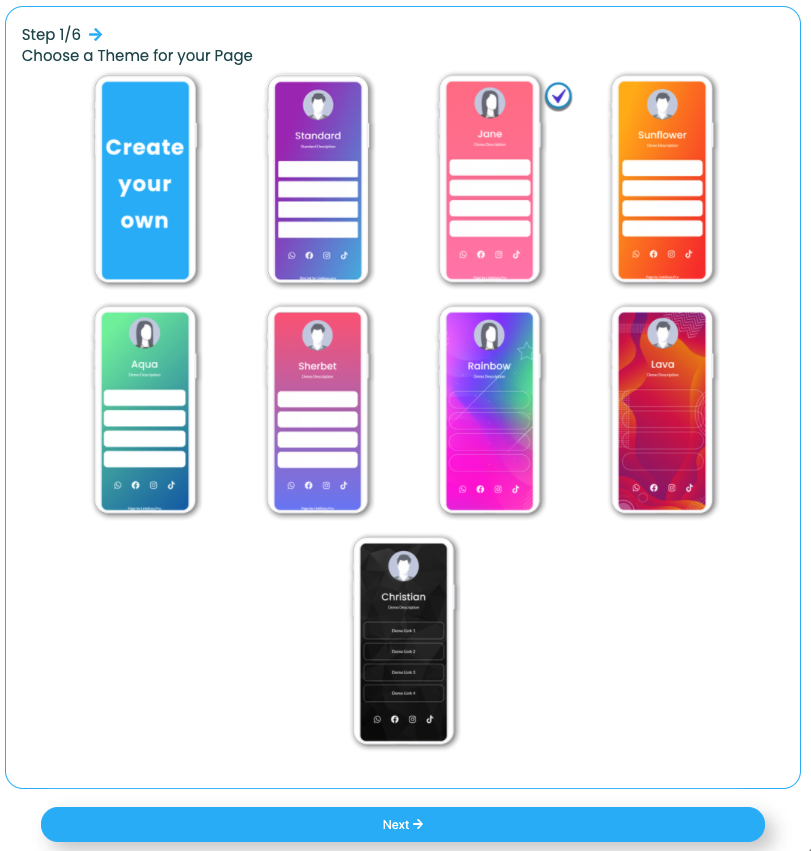
Step2. Select your preferred custom template design from the list of options.
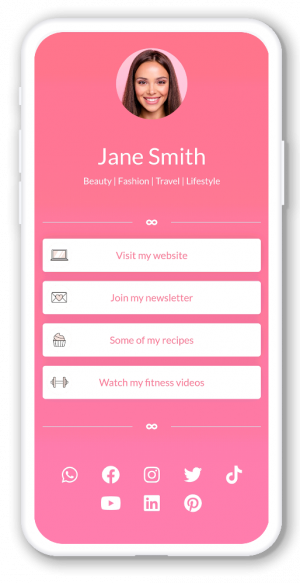
For this tutorial, we want to create a page similar to Jane Smith’s page below.
To create this page, select the “Jane” custom template from the available template list.
Once you have selected “Jane”, scroll down and click “Next”.
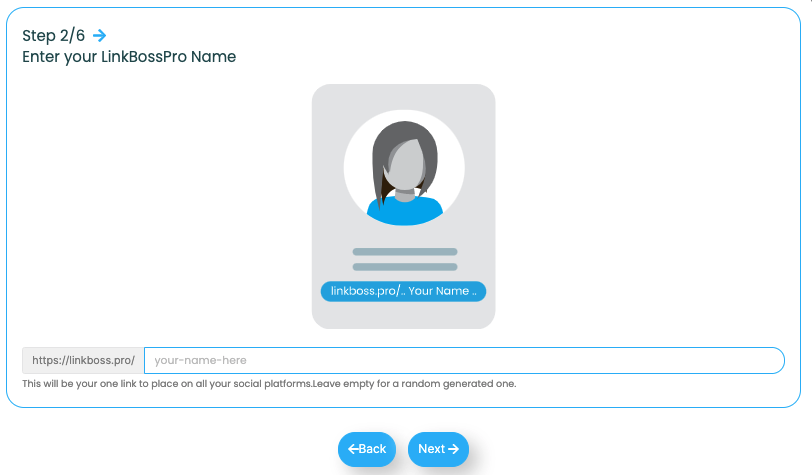
Step3. Enter your LinkBossPro Name
Your personal Biolink name is the link that you will share with your audience (eg: https://linkboss.pro/JaneSmith).
You can leave it blank and the system will provide you with a default name.
We would suggest that the Biolink name aligns with your brand and/or campaign.
Now click “Next” when you have inputted you preferred name.
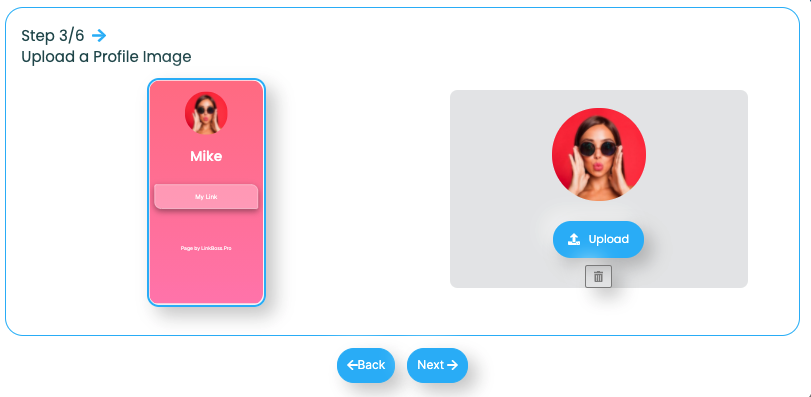
Step4. Add your profile picture to your page
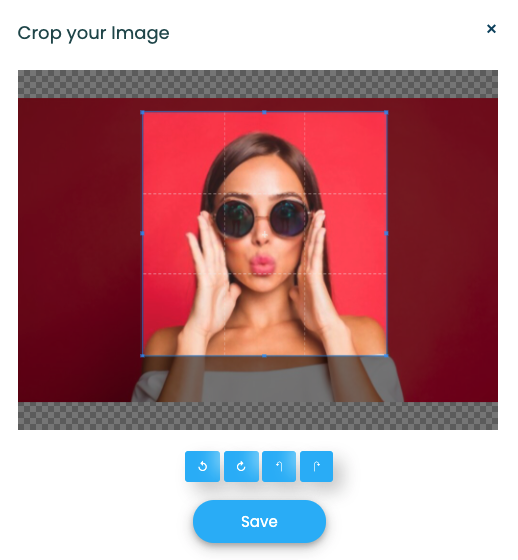
First, select “Upload”, then select your desired image from your files, and finally crop the image to show what you would like to feature in your profile picture.
click “Save” to commit the changes. Now,
You will now see a preview of your page with your newly selected profile picture on it. If you are happy with your profile picture click “Next to continue.
Step5. Add your page title and description
Enter a page title for your page. This is usually your name, brand name or page purpose.
Next, enter the description for your page. This is usually what you do or what your brand is about, or services you provide.
Once you have completed this, click “Next”.
Step6. Enter Your social media and key contact information details
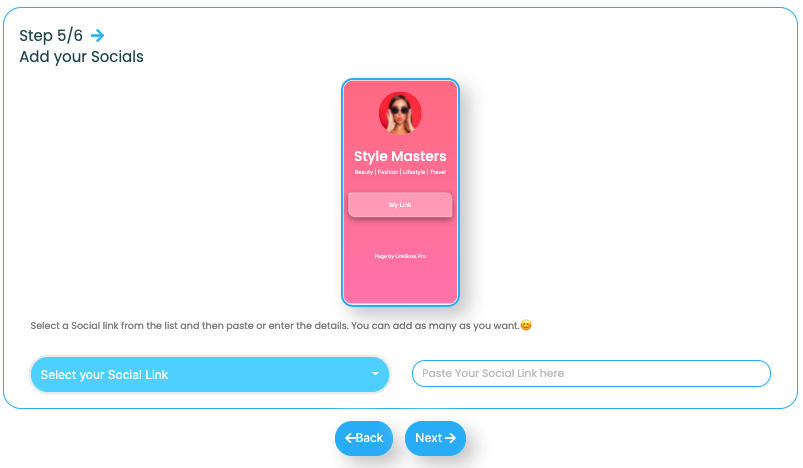
Click on the “Select you Social Link” button and select the type of social media or contact information that you wish to add to your page. As per the images below.
Click the "Select your Social Link"
Click on the option you want to add
You can no input your handle, number, or email as per the type that you selected. In our example, we have selected instagram.
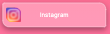
Once you have inputted your handle, you may select to either add it as an Icon or as a Link Button as per the image below.
If you would like both types to feature, then repeat the step above.
Same process if you would like to add additional social media or contact information.
Step7. Add content, and links to your page
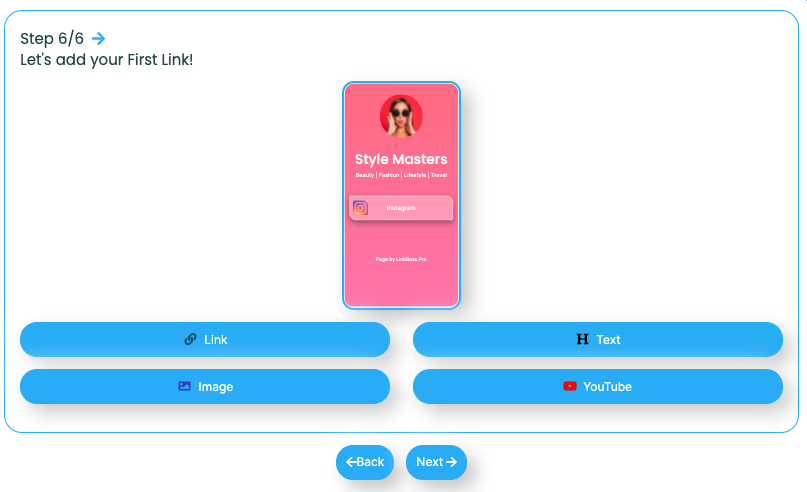
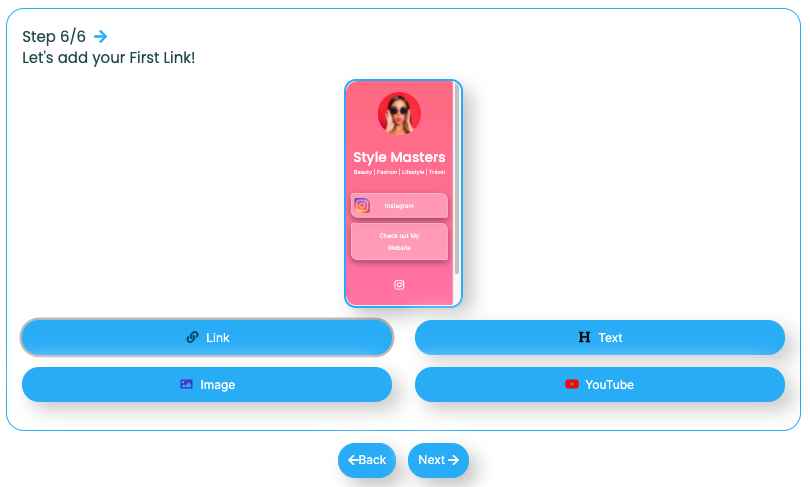
To add further content, select one of the options below your preview. You can add additional links or other types of links later if your preferred link types is not visible here.
We will add a “link” in this example.
Click “LInk, then as per the input box shown in the above image input the destination URL (where you want someone to go if they click the button), and enter a name for the button (what they see on you button on your page), then click submit.
You will now see you link on your page preview as per the image below. You can add your own custom thumbnail or icon later in the link settings.
If you would like to add additional links now, please repeat the steps above. When done, click “Next” to continue.
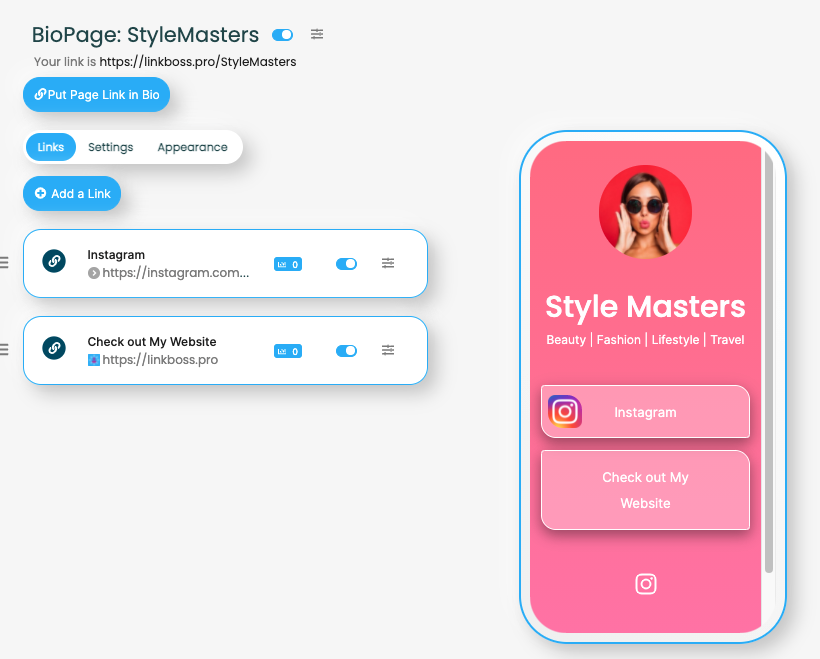
Congratulations, you have created your first page using a custom template. You may now select to “Put Page Link in Bio”, or “Continue Editing”.
If you select continue editing, you will be taken to your link settings page as per the image below, and you can continue to add content, edit settings, or the appearance of your page. For more help with this click HERE.
If you select “Put Page Link in Bio”, the box below will pop up. First select “Click to Copy your Link” button (located in the centre).
Then click on the social media platform that you wish to add your link in bio for. For help with where to input the link, please see:
If you have any additional questions about creating your Biolink page using a custom template or any other questions, please contact the LinkBossPro customer support team in the chat (blue icon in the bottom right corner) or check out more articles here in our blog or check our Youtube channel.
Alternatively, you can email our support team via support@linkboss.pro
We use cookies on our website to give you the most relevant experience by remembering your preferences and repeat visits. By clicking “Accept”, you consent to the use of ALL the cookies.
This website uses cookies to improve your experience while you navigate through the website. Out of these, the cookies that are categorized as necessary are stored on your browser as they are essential for the working of basic functionalities of the website. We also use third-party cookies that help us analyze and understand how you use this website. These cookies will be stored in your browser only with your consent. You also have the option to opt-out of these cookies. But opting out of some of these cookies may affect your browsing experience.
Necessary cookies are absolutely essential for the website to function properly. This category only includes cookies that ensures basic functionalities and security features of the website. These cookies do not store any personal information.
Any cookies that may not be particularly necessary for the website to function and is used specifically to collect user personal data via analytics, ads, other embedded contents are termed as non-necessary cookies. It is mandatory to procure user consent prior to running these cookies on your website.