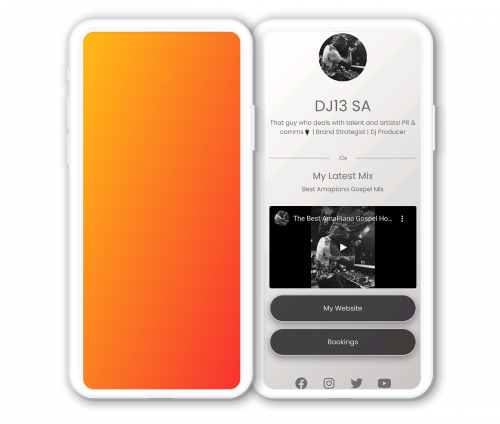
Use custom backgrounds to create your own unique page.
You can create your own unique look and feel by using one of 3 custom background tools that we have for you to use.
Instead of selecting a preset option, you can select to have a solid colour, a gradient background, or as a Pro user, you have access to the background customization tool and upload your own background image.
This means that you can create custom backgrounds that suit your brand and look great too.
To use custom backgrounds follow these steps:
Step1. Open the Biolink page that you want to add a custom background to by clicking on the Biolink page name or clicking on the 3 dots and selecting “Edit”.
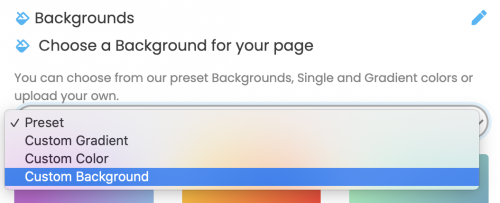
Step2. Go to your settings section and scroll to the “Choose a background for your page” section.
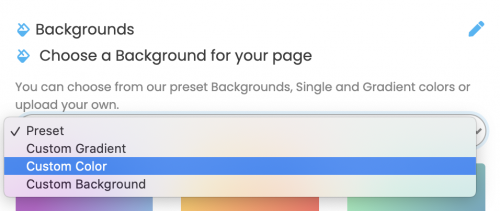
Step3. Click on “Preset”, then select either “Custom Gradient”, “Custom Color”, or “Custom Background” depending which option you want to select (see image above). We will start with showing you how to use the “Custom Color” option.
How to set a custom background colour.
First, Click on “Preset” then select “Custom Color”.
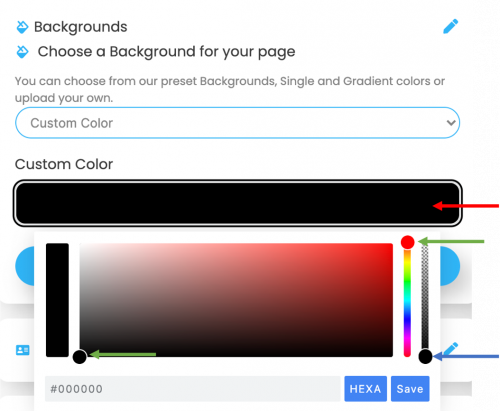
Next, click on the colour in the “Custom Color” field (by default this is black – indicated by the red arrow in the image below).
It will bring up the colour selection tool. Select your desired colour using the two colour selection buttons (indicated by a green arrow in the image below).
Finally, you can adjust the custom colour’s opacity using the slider tool on the far right (indicated by the blue arrow in the image below).
Once you are happy with your custom colour, click “Save”, and then “Update”.
Your custom background will now be visible on your page preview. Look to the right on desktop or scroll down to view the preview on mobile. Below is an example of a custom colour with and without content.
How to set a custom gradient background colour.
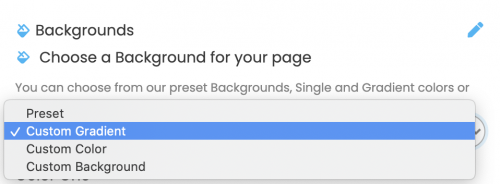
First, Click on “Preset” then select “Custom Gradient”.
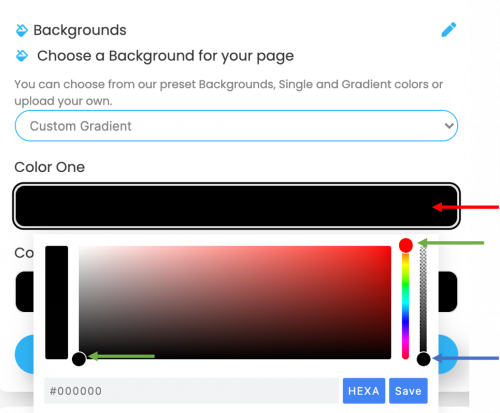
Next, click on “Color One” field (by default this is black – indicated by the red arrow in the image below).
It will bring up the colour selection tool. Select your desired colour using the two colour selection buttons (indicated by the green arrow in the image below).
Finally, you can adjust the custom colour’s opacity using the slider tool on the far right (indicated by the blue arrow in the image below).
Once you are happy with your first colour, click “Save”, and then repeat the steps above to edit “Colour Two”.
When you have created your final gradient and it is looking as you want it to look, click “Update” to commit the changes to your page.
Your custom background will now be visible on your page preview. Look to the right on desktop or scroll down to view the preview on mobile. Below is an example of a custom gradient colour.
How to set a custom image as your background.
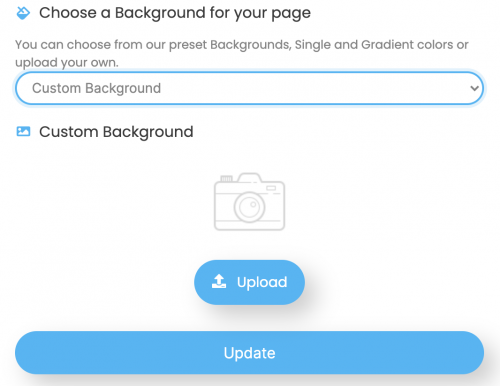
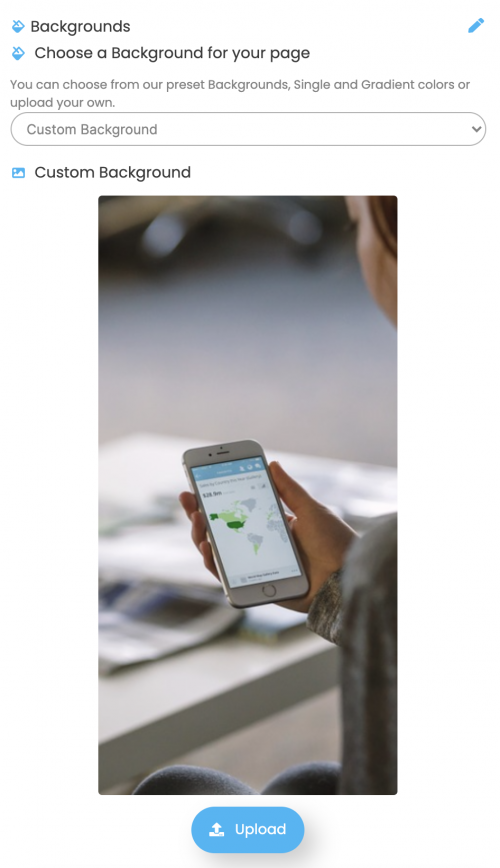
First, click on “Preset”, then select “Custom Background”.
Now, click “Upload” and select your custom backgrounds image from you phone or pc (the one that you have created for your Biolink page – see image below for a visual guide).
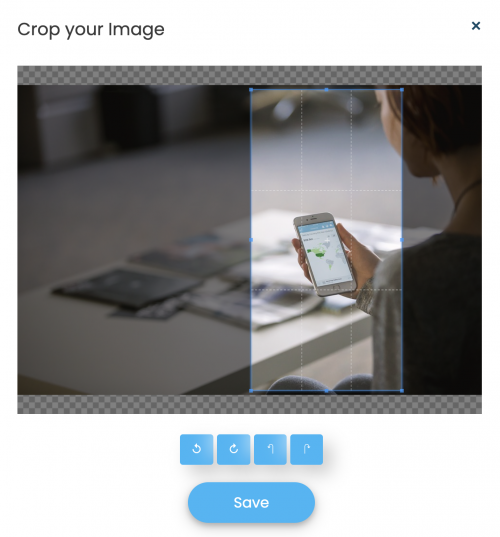
Next, select the area and position you want from the image and when you are happy, click “Save” (see image below for example).
You will now see the image on your settings page as per below image and on your Biolink page preview. Click “Update” to save the changes.
Still, need help?
If you have any additional questions about custom backgrounds, or any other questions, please contact the LinkBossPro customer support team in the chat (blue icon in the bottom right corner) or check out more articles here in our blog or check our Youtube channel.
Alternatively, you can email our support team via support@linkboss.pro
We use cookies on our website to give you the most relevant experience by remembering your preferences and repeat visits. By clicking “Accept”, you consent to the use of ALL the cookies.
This website uses cookies to improve your experience while you navigate through the website. Out of these, the cookies that are categorized as necessary are stored on your browser as they are essential for the working of basic functionalities of the website. We also use third-party cookies that help us analyze and understand how you use this website. These cookies will be stored in your browser only with your consent. You also have the option to opt-out of these cookies. But opting out of some of these cookies may affect your browsing experience.
Necessary cookies are absolutely essential for the website to function properly. This category only includes cookies that ensures basic functionalities and security features of the website. These cookies do not store any personal information.
Any cookies that may not be particularly necessary for the website to function and is used specifically to collect user personal data via analytics, ads, other embedded contents are termed as non-necessary cookies. It is mandatory to procure user consent prior to running these cookies on your website.